How to Correctly Size Your T-shirt Design for Different Size T-Shirts using Heat Transfer Vinyl (Video Included)
Introduction
Hey there Rozzy Crafters! Have you been stressing over what size your t-shirt design should be when you have multiple sizes to make? Well you’re in luck! This tutorial will lay it all out for you for all different sized shirts. We’ll be going in depth on tips and tricks for sizing your design for different sized shirts.
Now, the easiest way would be of course to make them all the same size, however, this did not suit me. I knew that a design that looked perfect on a size small adult t-shirt would not look right on a size 3XL and vice versa. I decided to match the size difference in shirts by changing the size of the design for each shirt size.
Standard T-Shirt and Design Sizes
Standard T-shirt Width for Adult Classic Tees
Small – 18 inches
Medium – 20 inches
Large – 22 inches
X-Large – 24 inches
2X-Large – 26 inches
3X-Large – 28 inches
4X-Large – 30 inches
Standard T-shirt Design Widths for Adult Classic Tees
Optimally, you need 5-8 inches of blank space on either side of a design to make it look right (for adult shirts). Here are the width sizes that I have come up with that work best for the shirts that I have made:
Small – Design width no bigger than 9.5 – 10.5 inches
Medium – Design width no bigger than 10 – 11 inches
Large – Design width no bigger than 10.5 – 11.5 inches
X-Large – Design width no bigger than 11 – 12 inches
2X-Large – Design width no bigger than 12.5 – 13.5 inches
3X-Large – Design width no bigger than 13 – 14 inches
4X-Large – Design width no bigger than 13.5 – 14.5 inches
Standard T-shirt Width for Youth Classic Tees
Extra Small – 16 inches
Small – 17 inches
Medium – 18 inches
Large – 19 inches
X-Large – 20 inches
Standard T-shirt Design Widths for Youth Classic Tees
Extra Small – Design width no bigger than 8.5 – 9.5 inches
Small – Design width no bigger than 9 – 10 inches
Medium – Design width no bigger than 9.5 – 10.5 inches
Large – Design width no bigger than 10 – 10.5 inches
X-large – Design width no bigger than 10 – 11 inches
Disclaimer: No two shirts measure exactly the same. Different brands, colors, and sizes can vary the true measurements of each individual shirt. Always measure your shirts to make sure that design sizes you have previously used still stand true. To avoid waste of material, you can cut a piece of scrap paper to the size of your design and use that as a test prior to cutting out your vinyl.
Note: Length is unfortunately not standard with shirts and varies greatly brand to brand. And variance in design length size is exponential, so I did not include a sizing guide for length in this tutorial. My rule of thumb is measure, measure, measure before you cut!
Now let's put all this information to work!
Supplies
- Shirts for designing
- Design software (e.g., Cricut Design Space, Silhouette Studio, Corel Draw)
- A cutting machine (e.g., Explore Air 2, Cameo 4)
- Heat Transfer Vinyl
- Weeding tool
- Teflon sheet or parchment paper
- Ruler (clear fabric ruler is best)
- Iron or heat press
Step 1 - Size the Design Using a Template
**This post focuses on using Cricut Design Space, but everything applies equally well to Silhouette Studio. A note on using templates in Studio is included at the end**
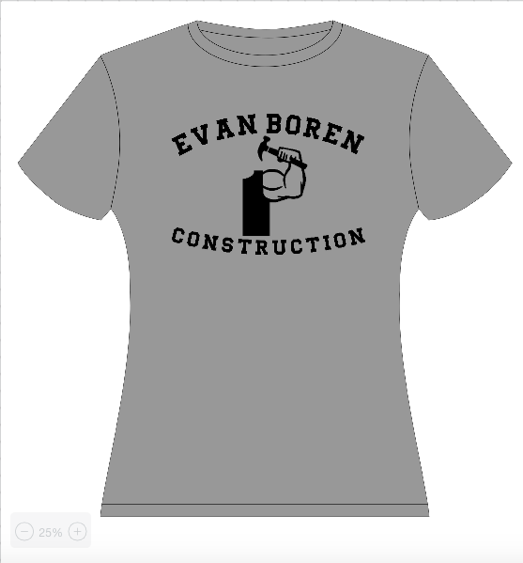
Once I create the design, I use the template option that is available on Cricut Design Space to create a “mock-up” of my shirt. I do this to make sure the ratio of my design is correct. Check out the video down below for step by step instructions on how to utilize this option.

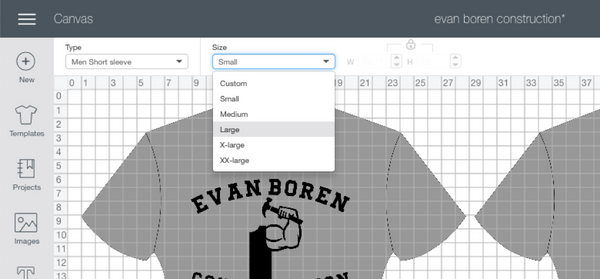
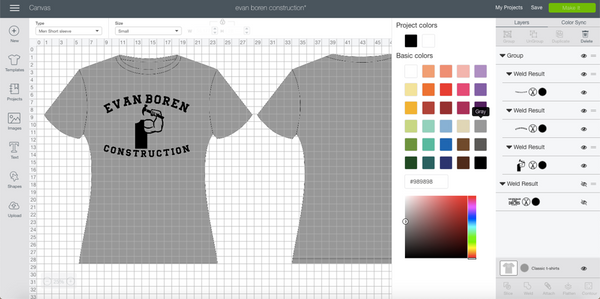
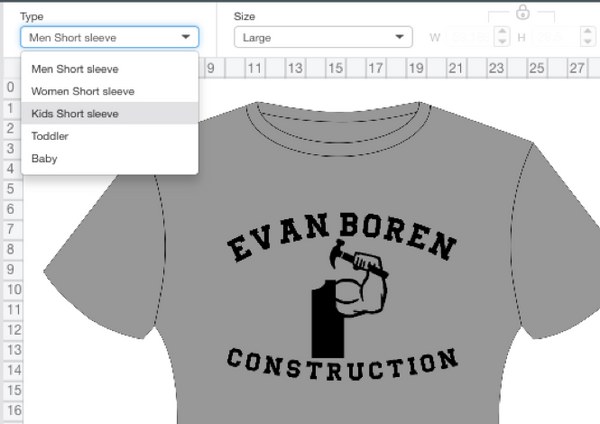
Using the templates, you can customize them to match your desired shirt. First, pick the color of your desired shirt.
Choose the style and size of the desired shirt (it only goes up to 2XL on the size options, but the “Custom” option can be used for shirts larger than 2XL).

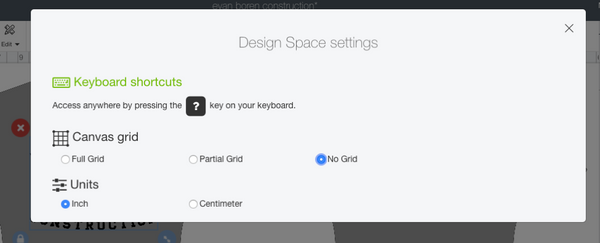
Remove the grid lines under “Settings.”
Then adjust the size of the design to be more aesthetically pleasing.

Once you are happy with your design, you can take a screen shot of the “mock-up” and send it to your customer for final approval before cutting your vinyl.
The same above can all be used for kids, toddler, and baby options. They are included in the template options. Just change the shirt style option.
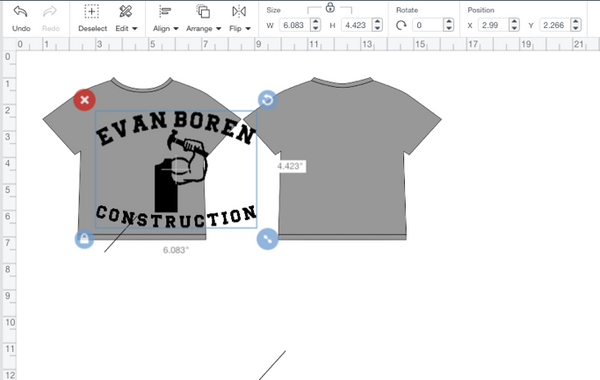
You can then adjust your design to fit the smaller sized shirt
Again, no two shirts are exactly the same size, so always measure before you make your cut!
Step 2 - Adjust the Design Size
Once I am completely happy with my design and get my customer’s approval, I will begin my cutting. I adjust the width and the length of the design for the shirt sizes that I have. Make sure you design sizing is locked so that the ratio of width to length remains the same for each size you are making.
The lock/unlock option is located at the bottom left corner of your selection.
Or above your sizing details in the top menu bar

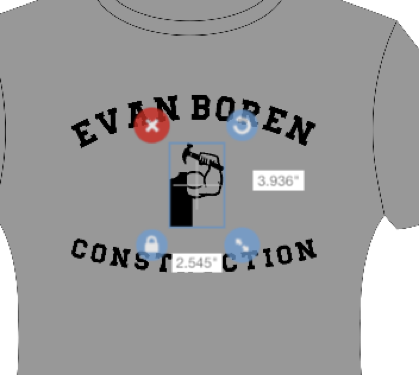
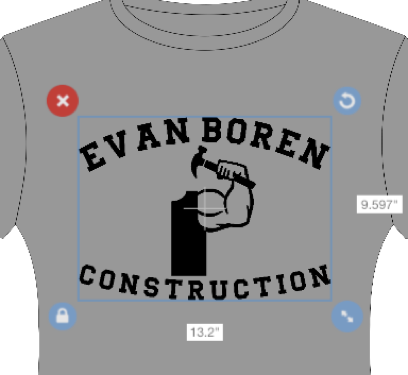
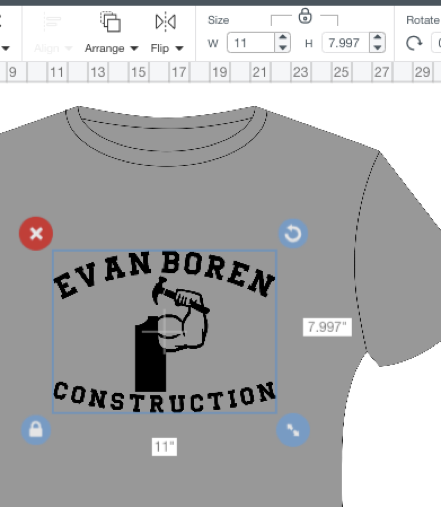
To adjust the size of you design, simply type in your desired width into the sizing details in the top menu bar or adjust it using the sizing adjustment button at the bottom right corner of your selection. The height will adjust accordingly if the design is locked.
This specific cut is for a 2X shirt, so the width is between 12.5 and 13.5 inches and the height was adjusted by the design being locked when the width is increased.
Make the cuts you will need for your first shirt.
Then adjust the size of the design for the next size needed. Next is a size large, so adjust the template to a size large.
Then adjust the width of the design. For a size large the width should be between 10.5 and 11.5 inches. When the width is adjusted, the height automatically adjusts if the design is locked.
The next shirt is a size youth small of the same design. Again, change the template size and adjust the width to match the above suggested size between 9 and 10 inches.
It is not necessary to change the template size if you are comfortable with the way your design looks. You can hide the template layer and just adjust your width/height for your design as desired. I like to take that extra step to make sure the design looks correct on all sizes prior to cutting each one.
Step 3 - Cutting and Pressing
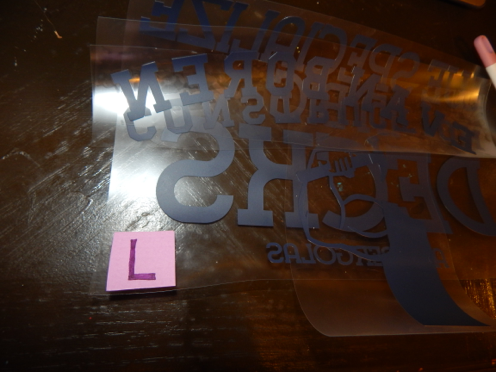
You can continue adjusting the size of your design and cutting them for each of the shirts in the various sizes you have. Make sure that each group of cuts is kept together. I will stick the different layers together after they have been weeded and will mark in the corner what the size is. This insures that the correctly sized design is with the right shirt size. You can always cut then press each shirt to avoid any mix ups.
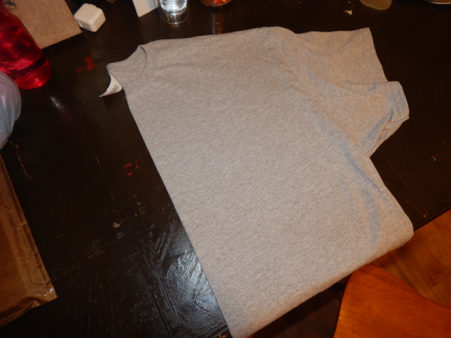
Prior to pressing, fold your shirt in half and press or iron it. This removes any moisture that it may have and also creates a crease you can use for centering the design on the shirt.

Always measure your placement prior to pressing. I prefer to use a clear fabric ruler so that I can see through it. Designs should start 2-3 inches below the collar for adult sizes and 1-2 inches below collar for youth sizes. Personally I do 2 inches below for small and medium adult sizes, 2.5 inches below for large and X-large adults sizes, and 3 inches below for 2X-large and above sizes. I use the same adjustment for kid sizes; 1 inch below for extra small and small sizes, 1.5 inches below for medium, and 2 inches below for large and X-large. Again, you want your design to consistently look the same on each shirt you make, regardless of size difference.

See the charts below for quick reference to use when deciding design sizing and placement:
ADULT
|
Shirt Size |
Standard Width |
Suggested Design Width |
Below Collar Placement |
|
Small |
18 inches |
9.5-10.5 inches |
2 inches |
|
Medium |
20 inches |
10-11 inches |
2 inches |
|
Large |
22 inches |
10.5-11.5 inches |
2.5 inches |
|
X-Large |
24 inches |
11-12 inches |
2.5 inches |
|
2X-Large |
26 inches |
12.5-13.5 inches |
3 inches |
|
3X-Large |
28 inches |
13-14 inches |
3 inches |
|
4X-Large |
30 inches |
13.5-14.5 inches |
3 inches |
YOUTH
|
Shirt Size |
Standard Width |
Suggested Design Width |
Below Collar Placement |
|
Extra Small |
16 inches |
8.5-9 inches |
1 inch |
|
Small |
17 inches |
9-9.5 inches |
1 inch |
|
Medium |
18 inches |
9.5-10 inches |
1.5 inches |
|
Large |
19 inches |
10-10.5 inches |
2 inches |
|
X-Large |
20 inches |
10.5-11 inches |
2 inches |
CONCLUSION

We hope this tutorial was able to help you with some of the questions you had regarding proper design sizing for various shirt sizes.
If you have any questions or suggestions, let us know in the comments below or on Facebook!
Tips for Using Silhouette Studio
If you are using the Silhouette Studio, there are a few extra steps to create mock-ups, but it is still easy. The first thing you need to do is to use an image of the product you are designing. For the sake of this tutorial, we will use a shirt. Find an image of a shirt that you have permission to use. Right click and copy the image.
Then go into your Silhouette Studio and paste the image onto your mat. You can also save the image to your computer and upload it into Silhouette Studio.
Once you have your template image added to your mat, bring your design in front of the image. You then resize your image and get your placement correct. Lastly, take a screen shot and you have a mock-up ready to send to your customer for final approval.
I know u the sizes given work for in regards to designs
By any chance if Tshirt sizesincrease/decrease by 5 cm will it not make sense for design to also
Appreciate the info
By any chance do you have different design sizes for other placements
Eg. Pockets
Across chest
The more the better if possible
Your video was so helpful…thank you so much for blessing us with that information bc as a new crafter it can be discouraging not know how to make it work!! So Thank you again👏🏾
This is the most helpful site you can ever come across!
This was SO helpful! Bookmarking this page to reference back to often! Thank you!
Leave a comment