Ultimate HTV Beginner's Guide - Part I: The Supplies

If you're new to the world of heat transfer vinyl, you've come to the right place!
In this three-part series, we'll be guiding you through everything you need to know to go from being a complete HTV newbie to successfully making your first custom t-shirt! We're going to cover the supplies you'll need (Part I), how to make your design (Part II), and how to apply your heat transfer vinyl to your t-shirt (Part III).
There’s going to be a TON of information in these posts, so we recommend bookmarking them and coming back a few times. Trying to digest all this info at once may be pushing it!
Let's get started!
Part I: The Supplies
Heat Transfer Vinyl
The first thing you’ll need for a heat transfer vinyl project is . . . well . . . heat transfer vinyl!
Heat transfer vinyl, or HTV for short, is a vinyl-like material that permanently attaches to another material when heated. Heat transfer vinyl is often used to decorate t-shirts, jerseys, hats, pillows, bags, and more. Whatever you put the HTV on, this underlying material is often called the "substrate."
A single sheet of heat transfer vinyl is made up of three different parts: (1) a clear plastic carrier sheet on the top, (2) the decorative vinyl in the middle, and (3) the heat-activated adhesive on the bottom (sometimes called the "hot melt"). Each of these parts serves an important function.

The carrier sheet holds the vinyl in place after it's been cut. The carrier sheet does this in two ways. First, it keeps the pieces of vinyl in place in relation to each other (e.g., keeping the spacing between letters constant during application). Second, the carrier sheet keeps the vinyl in place on the fabric (or "substrate") before and during application.
The colored vinyl in the middle is the decorative part of the sheet. It’s the red, blue glitter, or glow-in-the-dark that you’re trying to have show on your underlying fabric. It’s the whole point of using heat transfer vinyl!
The heat-activate adhesive (or "hot melt") on the bottom of the sheet is what makes the beautiful vinyl permanently stick to your substrate. It's like an insert for a hot glue gun. At room temperature it isn’t sticky, but heat it up and let it cool and then VOILA-- adhesion!
Varieties of HTV
Heat transfer vinyl comes in many different varieties and each variety comes in different styles. We’ll talk about a few of these.
Polyurethane or "PU"
The most popular type of heat transfer vinyl is made from polyurethane, so it’s sometimes called “PU” for short. PU HTV can come in any color and it has a smooth finish. It’s on the thinner side so it’s great for designs involving fine details, but it can also be used as an everyday HTV.

Rozzy Crafts offers a great 12-Sheet Starter Pack of PU HTV, which includes one sheet each of 12 different colors. We also sell single colors individually.
Other popular options for HTV PU include Siser EasyWeed® and Fame Crafts HTV.
PVC
PVC heat transfer vinyl is very similar to PU HTV. It comes in the same variety of colors and it also has a similarly smooth finish. The main difference between the two varieties is that PVC is thicker than PU. For that reason, PVC is not as good for thin detailed designs, but it is better for things like lettering or numbering on athletic apparel.
Rozzy Crafts does not currently offer PVC HTV and frankly there's no brand being offered out there that we know well enough to recommend.
Glitter
One of the most fun varieties of HTV available, glitter vinyl is a terrific way to add sparkle to your designs. As you would expect, the surface of the final glitter vinyl is a little rougher than that of regular PU or HTV.

Rozzy Crafts offers a fun 18-Sheet Glitter HTV Starter Pack.
Other popular options include Siser® Glitter and Fame Crafts® Glitter.
Flock
Flock heat transfer vinyl has a soft, suede-like finish. It’s not smooth or plastic-feeling like PU. It's also thicker than PU and even PVC. It’s great for adding a soft touch or some depth to your designs. It’s also an inexpensive alternative to embroidery. Flock HTV is great for hats, sweatshirts, and bags.
Rozzy Crafts doesn’t offer flock HTV at this time but popular options include All American® and Firefly®.
Others
There are many other types of HTV, including hologram, metallic, reflective, and glow in the dark. Rozzy Crafts hopes to offer all of these varieties soon!
Cutting Machines
Once you have your heat transfer vinyl, you’ll need something to cut it with. No matter how steady your hand may be, you’re not going to be able to make high-quality designs using a handheld knife. Instead, you’ll need to get your hands on a cutting machine.
The two most popular brands of cutting machines are made by Silhouette® and Cricut®.
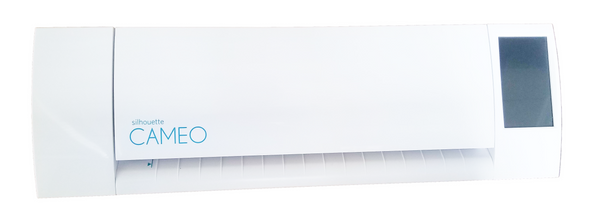
Silhouette®
Silhouette® offers three different cutting machines: the Cameo®, the Curio™, and the Portrait®. The Cameo® and Portrait® are very similar in that both are great for cutting relatively thin (up to 1mm) material. The main differences between the two are price (the Portrait® is less expensive) and also that the Cameo® can cut material up to 12 inches wide while the Portrait® cuts widths of just 8.5 inches. The Curio™, by contrast, can cut materials that are up to five times thicker than the Cameo® and Portrait®. The three machines can all cut the same kinds of materials, but the Curio™ can do so with significantly greater detail.
In general, if you’re looking to work with heat transfer vinyl and you’re interested in a Silhouette machine, we recommend going with the Cameo® or Portrait®.
 |
 |
 |
Whatever Silhouette® machine you get, it will come with Silhouette® Studio software (though the Curio™ does have some additional functionality in its version of the software). Silhouette® Studio is the program you use to make your designs that you’ll then use the machine to cut into your heat transfer vinyl.
Cricut®
Cricut® is the primary alternative to Silhouette®. Cricut® offers three different cutting machines: the Cricut Explore One ™, the Cricut Explore Air ™, and the Cricut Explore Air 2™. The Cricut Explore One™ is the base model and it has pretty much all the features you’d ever need, including the ability to cut, draw, and score over 100 different materials (including HTV!). The Cricut Explore One™ can cut shapes with widths of 1/4 to 11.5 inches and with lengths up to 23.5 inches. The Cricut Explore Air™ has all the functionality of the base model but it also has the added feature of connecting to your computer wirelessly through Bluetooth®, so no more worrying about moving your laptop close to your cutting machine. In addition, the Cricut Explore Air™ has a dual carriage (the thing that holds the cutting bade, writing pen, or scoring stylus), so you don’t necessarily have to remove the tool from inside the machine if you want to go from cutting your material to scoring it. Finally, the Cricut Explore Air 2™ has all the features of the regular Air model, except the Air 2 can also cut (or write on) vinyl, HTV, and cardstock at twice the speed.
 |
 |
 |
Heat Source
As its name makes plain, heat transfer vinyl requires heat! There are basically two main options for generating the heat necessary to stick your vinyl to your substrate—use your regular home iron, or use a specifically designed heat press.
Home Iron
Almost all new users of HTV start out by using their home iron. The simple reason for this is that you don’t have to shell out any more money and, more importantly, it works!

When you buy HTV, it will come with instructions on how to apply it. These instructions will include a specific temperature range that should be used to make the HTV stick to the underlying material. The average home iron can reach that temperature no problem—usually around the “cotton” material setting. One downside to using an iron is its limited surface area. Unless you are applying a small design, your HTV material is almost certainly going to be larger than the face of the iron. As a result, it’s impossible to evenly apply heat by covering all the HTV at once. Instead, when you use an iron you need to move the iron around, applying heat to every part of the HTV in sequence. Knowing how long to spend on one spot before moving on to the other spots can be someone of a guessing game. And if you guess wrong, part of your design may not stick to the underlying material or, worse, you may accidentally burn it!
Another downside is that irons don’t provide great temperature control. Most irons do not have a digital control of the temperature—instead you turn a dial to choose the kind of fabric you’re going to iron. One work around is to use another item from your home: your digital thermometer. Just hold it against the surface of your iron and you’ll be able to have a pretty good sense of whether your iron is the right temperature. This method is not perfect, but it works and it's cheap.
Heat Press
If you’re looking for a surefire way to evenly apply the correct amount of heat for the correct amount of time, then the heat press is for you! A heat press is a simple machine consisting of a fixed lower surface and a moveable upper surface.

The upper surface heats up and can be lowered to press against the lower surface. You place your substrate on the lower surface, lay your HTV on top of it, then press down on the heated upper surface for the indicated amount of time and PRESTO your HTV design will be applied to your substrate.
The two drawbacks of the home iron—surface area and heat control—are the strong suits of the heat press. Heat presses come in different sizes, but they will always have more surface area than a home iron. As a result, you can quickly and easily apply heat evenly to a 10 inch by 10 inch design, for example. In addition, most heat presses have digital controls for both heat and the timer, so you can be sure to apply the right amount of heat for just as long as the instructions tell you to do so.
The main downside to a heat press is the money. They can run anywhere from $125 all the way to $300 and more. If you’re new to HTV, and especially if you just spent $100+ on a cutting machine, you may not be in a rush to spend another couple hundred dollars on something you can handle with a home iron instead. Another downside to heat presses is that they are big! If you live in a smaller apartment without much storage space, you may find yourself having to use your heat press as a dining room table!
There are many different makes and models of heat presses, but we think the best bang for your buck is the Power Heat Press Industrial-Quality Digital 15-by-15-Inch Sublimation T-Shirt Heat Press. While not cheap, at $200 it’s pretty reasonable given its huge surface area and high-quality digital controls. This bad boy is great for tackling any HTV project you throw at it, and it's a must-have if you’re undertaking HTV projects as a way to make money.
Other Tools
Weeding Tool
Beyond the HTV and cutting machine, the last tool you must have to successfully create iron-on projects is a weeding tool.
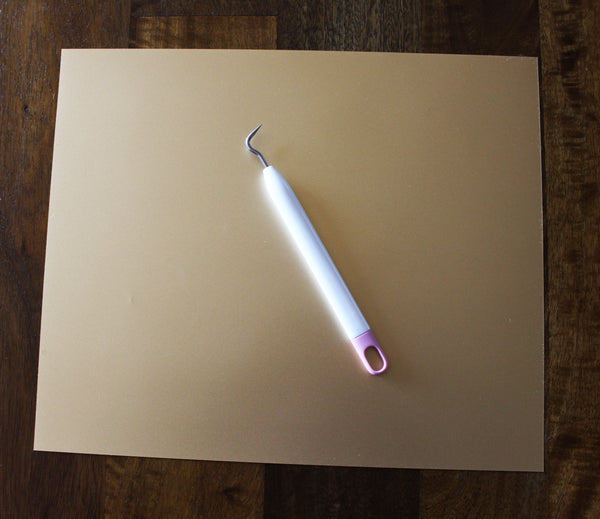
This tool is used to remove the unwanted vinyl that surrounds your design (i.e., the negative space). You could probably peel this material away without a weeding tool for some designs, but when creating a project with fine detail, you really have no choice but to use one. Cricut® offers a really sturdy one, but Silhouette® also sells one for less than half the price.
Cutting Mats
The cutting mat is used to hold your HTV in place while it's cut in the machine. It's not absolutely necessary 100% of the time, but it's a good way to increase your chances of achieving a perfect cut on one try. We especially like the 12-inch by 12-inch cutting mat by Silhouette, but the same-sized mat by Cricut works well too.
For a full discussion of cutting mats see our blog post, "How to Use a Cutting Mat with Heat Transfer Vinyl."
Teflon Sheets
While not absolutely necessary, some HTV crafters like using Teflon sheets. Use a Teflon sheet by placing it over the HTV once you’ve applied it to your substrate. You then apply the heat on top of the Teflon. This serves two functions. First, it protects your underlying material from getting burned by the heat source. Second, it keeps any melted HTV from getting onto your heat source’s surface.
Want to hear a trick? If you don’t have a Teflon sheet but want the same effect, just use parchment paper instead! It’s not as durable as Teflon—so you’ll likely only get a couple uses per sheet—but it works in a pinch!
Conclusion
That concludes Part I of this three part series. We know this seems like a lot of stuff to buy (it definitely is), but many of these things you'll need to purchase only once. After you have all the basics--like some HTV, a cutting machine, and a weeding tool--you'll be able to do a TON of different HTV projects, which can be so much fun and rewarding.
Ready for more helpful info!? Continue on to Ultimate HTV Beginner's Guide - Part II: Creating and Cutting the Design.
Happy crafting!!
Leave a comment