Oops! How to Remove Heat Transfer Vinyl When You've Made a Mistake! (Video Included)

We’ve all been there:
You’re rushing to complete a shirt, maybe because you want to get an order to your customer by the day you promised, or maybe because you want to be able to have your shirt ready to wear in time for your daughter’s soccer game. So you’re speedily making your design, cutting the vinyl, laying it all on the shirt, and pressing it all into place. But then you hold up your shirt and you realize you made a small oops! (Or maybe a big one!) What on earth are you supposed to do now? Throw it all away and start over???
NO! Don’t toss that shirt. Save it instead!!!

In this blog post, we’re going to teach you a very simple, easy, and chemical free way to remove any unwanted HTV! This approach can even be used to remove HEAT TRANSFER VINYL that’s layered. We promise you’ll hear the bells ringing when you realize how easily you can use this technique to correct your mistakes.
We all make mistakes and are bound to make more! After much research, we decided we wanted to figure out THE BEST way to remove mistakes while also using the least amount of chemicals as possible (if not completely chemical free). Some children are sensitive to certain chemicals, so you really don’t know what someone else might be allergic to. You don’t want anyone having a bad experience with a shirt you made because you used chemicals to fix something. Ready to learn this awesome technique? Let’s go!
In this blog post, we’re going to teach you a very simple, easy, and chemical-free way of removing unwanted HTV! This approach can even be used to remove heat transfer vinyl that’s layered. We promise you’ll hear the bells ringing when you realize how easily you can use this technique to correct your mistakes.
READ MORE "HOW TO" BLOG POSTS!
We decided we wanted to figure out THE BEST way to remove mistakes while also using the least amount of chemicals possible (if not completely chemical free). You really don’t know what someone else might be allergic to. You don’t want anyone having a bad experience with a shirt you made because you used chemicals to fix something.
Ready to learn this awesome technique? Let’s go!
Supplies
You only need three items to remove already-pressed HTV:
- A scissors, X-Acto knife, or razor blade
- Tweezers
- A hot iron
These other items may also come in handy:
- Petroleum Jelly or Goo Gone (if necessary)
- Rubbing Alcohol
The Steps
Here’s how you go about removing your unwanted heat transfer vinyl:
Step 1
Turn your iron on its cotton/linen setting (or whatever else is the hottest temperature).

If your garment is not cotton or linen, use the appropriate heat setting. You don’t want to melt your garment!
Step 2
Place your shirt over the iron so its hot surface is on the backside of where the vinyl is attached. Most of the time that will mean putting the iron inside the shirt. BE CAREFUL NOT TO BURN YOURSELF!!
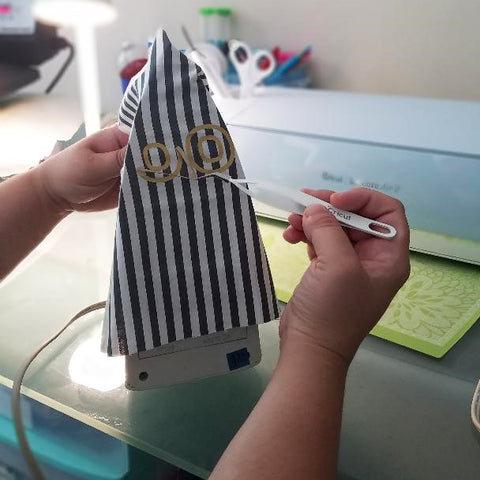
Step 3
- Place the area of the unwanted heat transfer vinyl over the plate and pull tight with one hand.
Step 4 - Plan A
Using your scissors, X-Acto knife, or razor blade, gently use a sweeping motion to pick away the HTV, starting at the top of the unwanted heat transfer vinyl. The material might come off in chunks at a time. Just keep picking at the vinyl.
You’ll begin to notice that the vinyl starts to peel off very easily after being heated for a bit. You can continue using the scissors or you can grab the tweezers to pull the HTV off. That way you do not burn your hands. Saying that from experience, burns can be nasty! The vinyl should peel off like butter!
TIP: Use rubbing alcohol to clean your scissors throughout this process.
Plan B
As we said, we try to stay chemical free, but you might need a little extra help if you find the HTV isn’t coming off. In those situations, we like to use Goo Gone to get that extra residue off. Goo Gone is great because it’s not as harsh as the popular vinyl-removing solvents. Goo Gone has a mostly pleasant smell. BUT if you’re not comfortable with using the Goo Gone, there’s still another way!!
Plan C
We all have this in our homes, and, if not, you can find it at your local stores for about a buck. That’s right--petroleum jelly!
Petroleum jelly helps loosen up the adhesive. Just apply a small amount of jelly to the adhesive stain. Then take a sensitive detergent (like "ALL") and rub it in a circular motion into the jelly. The adhesive should start to clump up. When it does, take the shirt and rinse the area with the hottest water the shirt tag recommends. The detergent and the jelly should rinse right off your shirt. This process can be repeated until all the residue comes off the shirt.
Step 5
Once you’ve successfully removed all the heat transfer vinyl and residue, you can go ahead and wash the garment inside out before reapplying your designs.
If you used any chemical to remove a partial area of your design, we recommend that you wait 24 hours so to make sure the rest of your vinyl is set again. Then you can go back and press what you originally wanted on your shirt.
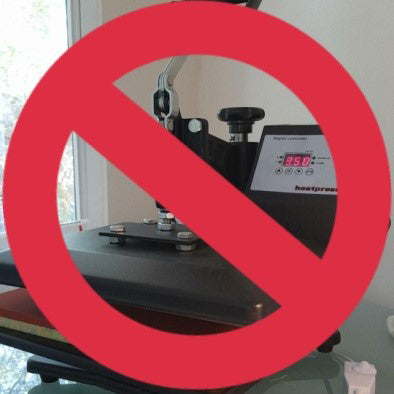
Please do remember, this technique only works with an iron not your heat press. Also make sure that your material is not heat sensitive!
READ MORE "HOW TO" BLOG POSTS!
Conclusion
If this technique doesn’t work perfectly for you the first time around, don’t get frustrated (or at least try not to get angry at the mistake). Where there is a will, there will always be a way!
Have fun with your HTV, experiment, and for you newbie crafters keep pushing forward! Don’t be afraid to layer your heat transfer vinyl. You’ve got this! Let your creativity flow from your fingers to the finished product.
You are amazing! I’ve wasted sooo many items but now I won’t! Thank you so much for this hack!
Thank you!! I pulled the shirt out of the trash to try this, just craft trash! Worked in less than 5 minutes. Thank you!
Yes this might work for cheaper quality vinyls with lesser adhesion properties but I tried it on premium Stahls products and it had no effect whatsoever!
this worked like a charm! I was able to remove the htv, but it still leaves an outline of where the image was. any idea how to remove it?
Must the iron be on steam. A t shirt is also on cotton
Leave a comment