How to Create a Framed Heat Transfer Vinyl Project on Canvas (Video Included!)

H-E-L-L-O all you Rozzy Crafters! We have an amazing project for you to do this weekend! You can find pre-made versions of this item all over the marketplace, but why buy it when it’s simple and you can make it in your own home?! Plus, doing your own heat transfer vinyl crafts is so much more rewarding! I know it is for me. In this tutorial, we'll explain step by step how to make your own "reverse canvas HTV" project like the one in the picture above! If you're still unsure about what to do after reading through these steps, just watch the video at the end of the tutorial!
Ready, set, and press!
Supplies
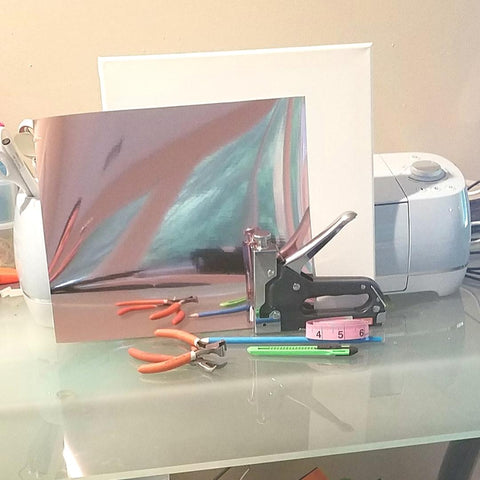
Here is what you will need for today’s project:
- Any size stretched canvas
- Pliers
- Snipper
- Staple gun
- Chalk paint or spray paint
- Paint brush (one fine tip and other wide)
- Scissors or X-acto knife
- Ruler
- Your choice of heat transfer vinyl (by Rozzy Crafts, hopefully!)
- Heat press or iron
Step 1
First you'll need to turn your canvas upside down so the back is facing you. You'll use your snippers and pliers to remove all the staples that are holding the canvas to the wood frame. Begin by using your snippers to break the staple in half. Then go in with your pliers and pinch one of the half staples. Then rock the pliers to one side and pull.

The staple should come right out. Sometimes you have to use a little bit more force. Don't worry if you scratch or dent the back of the canvas while trying to remove staples. You won’t see the error because you will eventually paint it and it’s also on the back of your project. So no worries!
Keep a bowl close to you to put the staple pieces in-- you don’t want to step on one! Ouch! This process may take a little while. It is the longest part of this project. But the end result is worth every second!
Step 2
Now that you have all the staples removed the canvas will come off of the wood frame.

Next, choose which color paint you would like to use on the frame. We recommend chalk paint, as it dries a lot faster. Or you can stain the wood if you like a natural finish to your frame. There are some spray paints that have a fast drying time as well.

(In the video below, that is what we used to test its drying time compared to the chalk paint. It took just a little bit longer than using the chalk paint, but had an added benefit of spraying. This took us less time to rather than doing the painting.) Now you want to paint both sides, including the inside of the frame.
When doing this step, make sure that your work area is well ventilated. While the frame is drying, move on to the next step.
Step 3
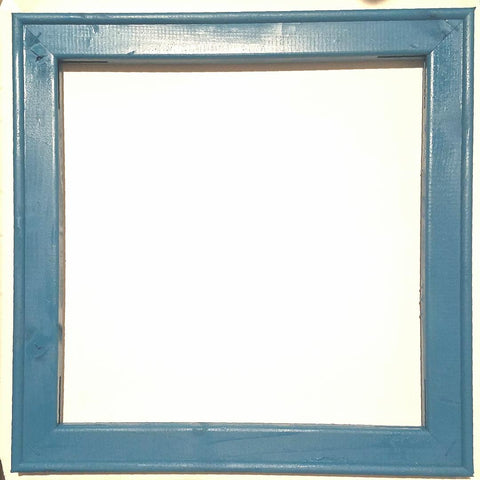
Cut out and weed your HTV quote or picture that will be going on the canvas. Make sure you measure how much room you have inside your frame before printing. Example: we are using a 12 in x 12 in frame with 1.5 in wide slats, so really we have only about a 9 in x 9 in area within the frame (at the largest) to work with.
Once you've cut and weeded your HTV, your frame should be dry if you used chalk paint. (Other paints and finishes make take 30 minutes or up to an hour or so to dry. Just keep checking on the back of your frame. In case it is still wet you won’t leave a finger print. Once your frame is dry you can move on to the next step of our project.)
Step 4
Place your canvas flat on your work area. Then place the frame over the canvas. (In the picture below, we placed an identical frame over the canvas since our frame wasn't dry yet.) Use a pencil and trace the outline of the frame on your canvas.

Once you have it traced, remove the frame and cut the line with your scissors or X-acto knife. You want to cut slightly inside your line as that will be stapled down later on.
Go ahead and place your HTV on the canvas where you would like it to be. We recommend getting that ruler out and double or triple checking. Once you are satisfied with your placement you are ready to press your HTV.
Step 5
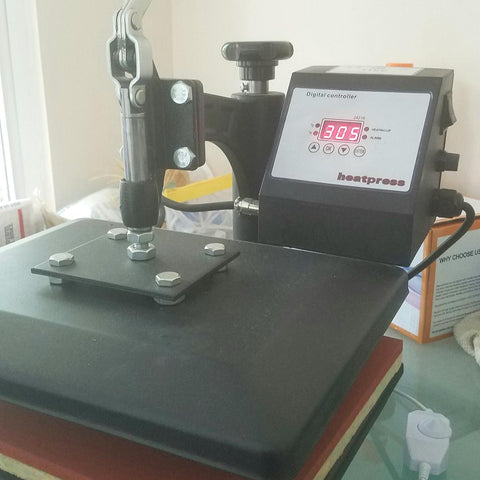
Heat up your heat press to 305 degrees Fahrenheit or your iron to a cotton setting. Once heated up, cover your canvas with parchment paper or a Teflon sheet, and go ahead a press for about 20 seconds with the heat press. If you're using an iron, press about 30 seconds.
When the carrier sheet is ready to be removed (REMEMBER Rozzy Crafts is cool peel!), go ahead and pull the sheet off at an angle.
If you're using an iron and have a bigger area to press, you might not have applied even pressure all over. So pull slowly to make sure your HTV properly adhered to the canvas. If you see that it didn’t adhere, lay your HTV sheet back down flat and re-press the areas that didn’t adhere. Now that your HTV is pressed you’re ready for the final step!
Step 6
Place your frame back over your canvas and turn it upside down. Make sure you check to see that your canvas is straight on the frame. Using your staple gun, start at one side of the frame. Pull the canvas tight making sure there are no bubbles in between the staples. Your first staple should be in the middle of one side of the frame. Then work your way towards the corners. After one side is complete, move to the opposite side, pull it taunt, and staple it down. Repeat this process for the other two sides.
Conclusion
Congrats! You just made a one-of-a-kind piece of art for your home, office, and classroom, or as a gift. And it cost you way less than what you would have paid for it at the craft stores. Watch, save, and create!
We can’t wait to see everyone’s finished projects. As always, keep crafting!
Leave a comment